The storyboard process continues our series about How You Can Make a Comic Book. During the storyboard process you determine the page count, working frame layout, camera positions (or perspectives) and framed content. This is where your imagination really comes to life. Grab your script and get ready to draw. And if you are me, draw badly (proof further down).
Because we are a small creative group, we use simple methods based on complicated movie-making processes. To see a more complicated process, check this out. Starting at the beginning of the script, go to each shot (establishing, close, wide, etc.) and place a number, starting with 1, next to each. This is your shot list.
Layout
Our comic books have a simple layout to accommodate a variety of uses. We design the print product to be used easily in digital formats. We also intend the scenes to have animation and VR uses. You will determine your own look and feel for the pages of your comic book.

Pentavis Comics storyboard template.
The template we use represents two pages facing each other. It is just a place to start as we use the shot list to see what the scene size could be.
Panel Sizing
Usually the first scene you see when being introduced to a location, is called an establishing shot. By using the script image from Part 1 – The Script, we can see that it begins with an external shot of a private jet flying through the sky. It sets the stage for where the actions following are going to take place. I want that to be fill the width of the page because it is really important. You can see how I arranged the shots on the page and their sizes (based on importance). You can also see proof that I can’t draw.
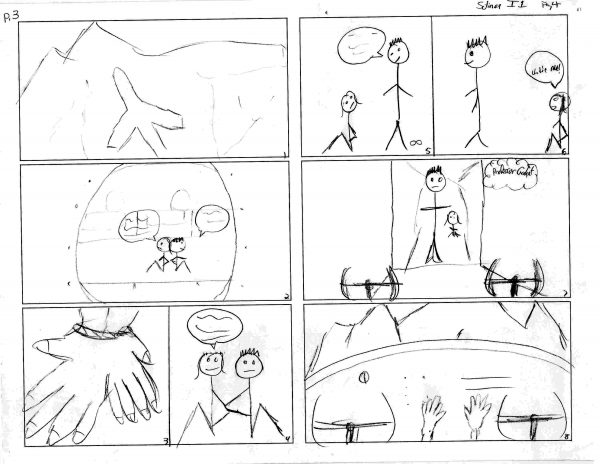
Storyboard intro to Solinox #1
What is in the panels are simple sketches to get an idea for how the action would look through the lens of a camera. You need to balance the actions with enough room for speech bubbles, narration blocks, sound effects, etc. Sometimes you may have to split up the shot into separate panels to accommodate the balancing.
Page Count
You may have noticed the image is the first page of Solinox #1 – The Past Returns, but the storyboard shows page 3 and 4. This is because the book cover is page 1 and the back side of it is page 2. If this was my complete script showing a jet with people escaping their binds, there wouldn’t be enough pages to go to print. Most printed books require 4 pages. With this example we have front cover, inner cover, page 3 and 4, inner back cover and back cover (covers not shown here), all totaling 6 pages. To solve the issue of not enough pages, you would have to write more content to fill up two more pages or modify the layout and sizing of panels to fill them up.
Continue to layout your scenes and sketch your actions. Near the end, make sure you are on track with having a page-count divisible by 4. When done, you will be able to see the big picture of what your comic book will look like. It will be a great feeling which will turn into enthusiasm for the next step – previsualizing the set. Keep an eye out for our next blog post called, How You Can Make a Comic Book: Part 3 – The Previz.
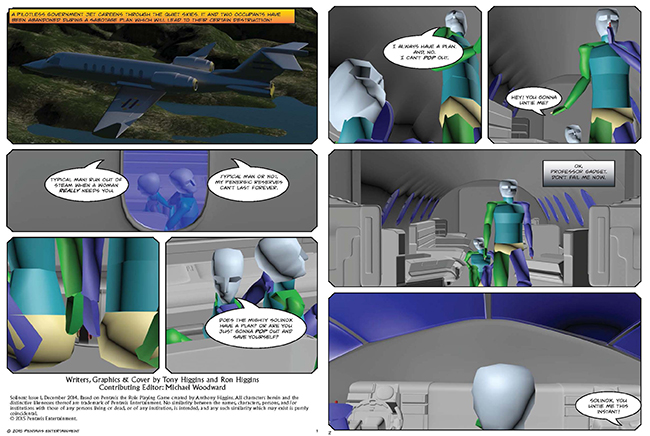
Solinox #1 – previsualization of pages 3 and 4
Thank you for taking the time to read. If you liked this post, please pass it on and follow us on social media. We hope to hear from you.
Tony Higgins